

Royal Adelaide
Seaton Links found its home between the city of Adelaide and St Vincent Gulf in 1906, where Club Professional Dan Soutar laid out its first iteration amongst the sandhills. It was however, Alister MacKenzie’s famous fleeting visit down under which transformed the layout as he re-routed holes through the dynamic craters and dunes across the property. On first inspection, MacKenzie had great affinity for the site; “real links land - a delightful combination of sand dunes and fir trees. No seaside courses that I have seen possess such magnificent sand craters as those at Royal Adelaide”, and what he left behind is one of Australian golf’s most endearing and entertaining outposts.
The appeal of the Seaton site is obvious from the outset
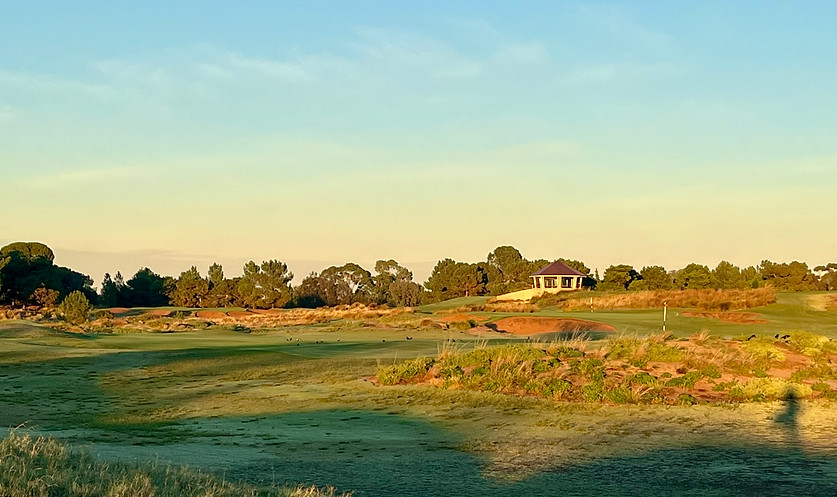
The outlook from Royal Adelaide’s terrace gives plenty away – the sprawling view is utterly golfy. flooded with tight swathes of rolling short grass, fluttering flags, handsome flashes of native vegetation and smatterings of red sand hazards. Though others may lay claim to Australian golf’s finest clubhouse view, one would be hard pressed to find one which beckons them to the first tee more persuasively.
Amongst the golf, it’s the trainline however, which dominates conversation from the terrace as it rushes by the clubhouse. World class golf and railway lines have a long and fruitful history. Zoom in on a generous handful of Great Britain’s finest old links and more often than not, one will find a historic railway nearby. Typically, this relationship is more neighbouring than intertwined, think Prestwick’s opening hole as the train speeds up the right side of the property, even the Old Course at St Andrews had a train run the length of its 18th hole at one point in time – Royal Adelaide however, goes a little further as the railway line slices the property in two with golfers playing across it on multiple occasions. As the train passes through at regular intervals, it brings with it an entirely pleasant sense of place.

A striking, sandy site
A property abundant in the natural qualities of world-class golf, though relatively flat, the sporadic bumps, hollows and rolls deliver a charming riff on linksland. Seaton’s firm, bounding turf brings the subtle rises and falls to life by maximising its effects on the bouncing ball, delivering a pleasant helping of random bounces. Crucially though, these gentle features are violently split by domineering dune ridges and plummeting sandy basins which stamp the routing with some of its most memorable and thrilling sections of golf. The resulting distinct changes of pace throughout the loop are a key cog in Royal Adelaide’s rolodex of compelling golf.
Not limited to the railway, Royal Adelaide’s charms are rich – a delightful concoction of the eccentric and the traditional. Its sprinkling of quirky features – blind shots over dunes into craters below, quick doglegs and the celebrated angular strips of greenside rough present a smorgasbord of unique and memorable conundrums. Given the relatively tame site, the diversity of golf is remarkable and the spread of shots it demands as wide-reaching as any – up and over sandhills, threading through valleys of dunes, plunging down to fairways 30 feet below and summiting greens perched well above the golfer’s head, all the while maintaining the playability, optionality and seamless flow which MacKenzie implores.
Tee shots like the dogleg 15th put the elevation change to good use
Royal Adelaide is the poster child for the totality of a layout outweighing the individual merits of its holes. Whilst the highs of its routing reach undeniable heights and the strategic consistency owing to the relationship between the hazards and glorious green sites is admirable, the round is tied together beautifully. The intimacy of its routing where golfers rarely feel more than a two-shotter from the clubhouse, the sheer variety and originality of its predicaments, and the distinct old-world charm draped over the property where nothing feels overdone or out of place, all combine to make a loop of Seaton feel like something of a one of one.

The intimacy of Seaton ties the round together
Although understandable given the endless cluster of top-shelf golf, it is a shame that voyages down-under tend to center around Victoria with a quick side-trip to Tasmania – for the golfer travelling, the joys of Royal Adelaide are too abundant and unique to forego. With so much to discover throughout its routing and so much to enjoy off the course, if offered a single club to see out my golfing days, I would be hard pressed to look beyond the allure of Seaton – one of the game’s great treats.

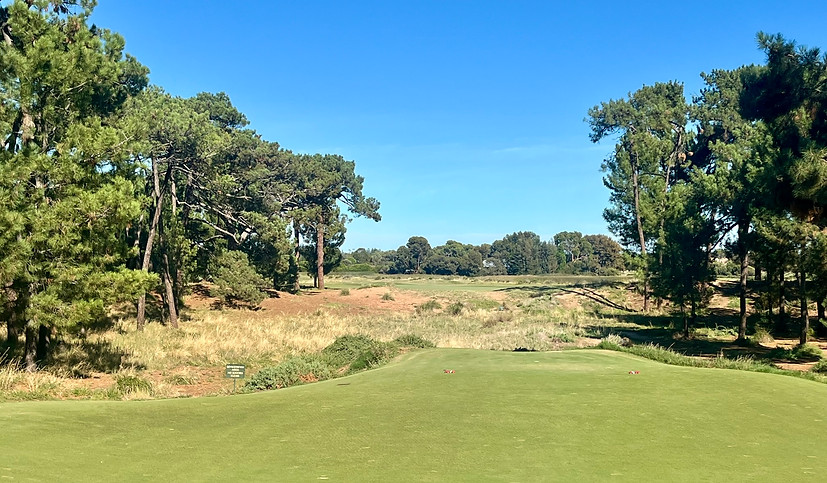
The view back down the first fairway
The Second
Though the par-five second is most famous for its diagonal tee shot crossing the railway, the relationship between the bunkers and green complex is the core of its quality. Best approached from the right-side, fairway bunkers contest the lay-up and a striking hive of hazards crowd short-right of a surface loaded with shoulders and mounds.

The glorious bunkering short of the second green
The Third
As golfers travel enough around the world, stumbling upon entirely unique concepts and holes becomes something of a rarity – Royal Adelaide’s third hole presents one of those joyous occasions. Teeing blindly over a dune ridge, less than 300-yards separates tee from green as the fairway cascades downhill beyond the ridge. The iconic one-of-one green complex is a narrow landing pad angled front right to back left, its left flank guarded by a thin strip of rough which follows the angle of the surface. Though seemingly innocuous, this sliver of rough introduces all sorts of predicaments for the golfer pitching from the left, flying it and holding the firm, narrow green a shot loaded with difficulty. MacKenzie’s most famous parting gift to Seaton is one of the world’s finest short fours, it’s a wonder it hasn’t been replicated elsewhere.

One of the game's most original greens
The Fourth
MacKenzie spoke glowingly on the craters of Royal Adelaide - the handful of deep sandy blowouts which litter the property. Golfers first encounter Seaton’s depressions at the fourth tee which plunges dramatically downhill beyond the crater, legging sharply to the left. Loaded with beautifully random humps and hollows, its fairway oozes the characteristics of a seaside links, while the deep hazards left of the green make approaching from outside of the dogleg the preferred angle.

The glorious undulations of the fourth fairway
The Seventh
A visually striking and demanding test of execution arrives at the one shot seventh - daunting 180-yards of carry to a picked up putting surface draped in a necklace of bunkers. With no bail-out and a severe 10-foot drop-off beyond, only a well struck, soft landing iron will suffice.

Tight margins approaching the seventh
The Tenth
Royal Adelaide’s most thrilling tee shots play blindly up and over dune ridges, the heroic carry rewarded by a speed slot beyond. The tenth tee does just that, and the golfer who challenges the hilltop hazard up the right is granted an enticing shortcut. A broken sandy rampart puts a hard stop to the fairway around 70 yards short of a devious surface split by a shallow plateau, beyond which balls funnel sharply long of the green.

A scrubby rampart divides the tenth fairway
The Eleventh
Alongside the charming quirk of the third, the ‘Crater Hole’ at the eleventh is Seaton’s most famous chapter. Another unsighted landing area beyond the ridgeline asks plenty of questions from the tee. Most memorable however, is the sprawling sandy hollow short of the green which injects a thrilling downhill approach to a surface sitting handsomely amongst an amphitheatre of orange sandhills. A two-shotter which commands two proper shots – there is plenty of satisfaction in making four at the Crater Hole.

A remarkable green site
The Fourteenth
A classic par four which crosses the railway and winds across rumpled terrain. A hive of bunkers crowds the right side, however it is one of the rare occasions at Royal Adelaide where an alley of trees determines proper positioning from the tee as they pinch the angle of approach. A gully of sandy scrub must be carried to reach the slightly picked up, domed surface which spills off in all directions.

Looking back down the tumbling 14th